
A profile or cover picture can be changed or added to a single location or to multiple locations at the same time.
There are 2 possible ways to add a picture in Listings: In Brand Management or in Locations.
Locations
To add a picture to a single or multiple locations through Locations, you need to:
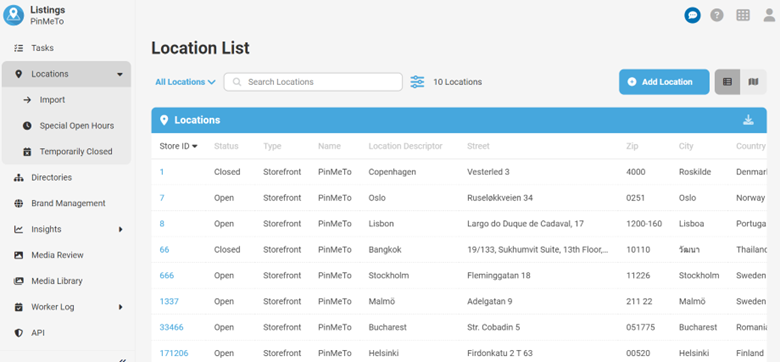
- At Listings, click the Locations button in the menu on the left.
- Select the location where you want to upload/update the image.
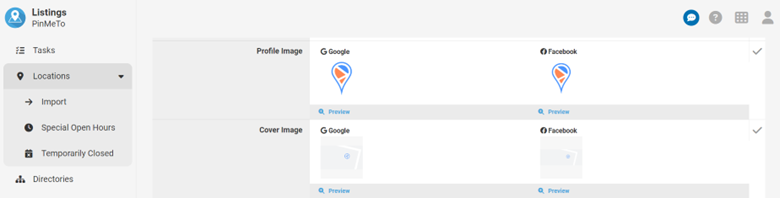
- To change the Profile Picture, scroll down to “Profile Picture” and click on “Google” or “Facebook”, depending on which platform you want to make the changes.
- To change the Cover Picture, scroll down to “Profile Picture” and click on “Google” or “Facebook”, depending on which platform you want to make the changes.
- Press “Upload Image” to add the new picture.
- You can also select one of the pictures you’ve previously uploaded to Listings.
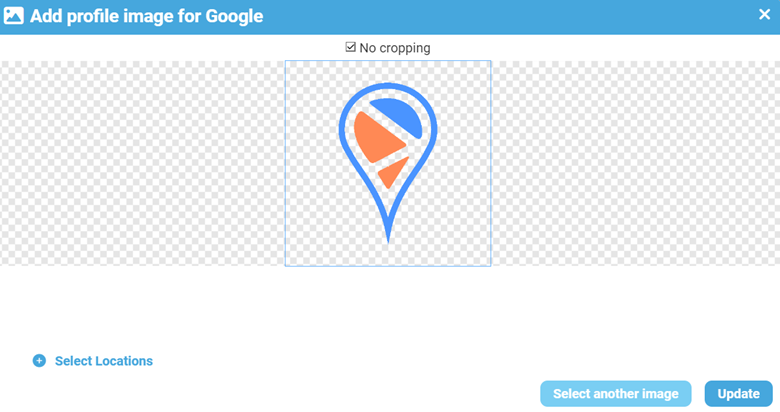
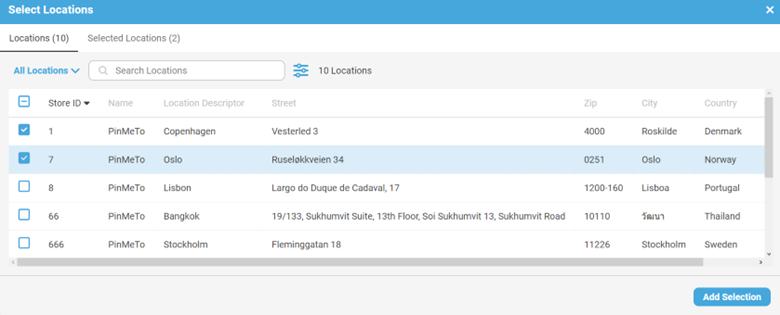
- Crop the new image if necessary and select to which locations you want to apply those changes. By clicking on “Select locations” you can choose which locations you want to upload the image. It can be to one location, all locations, or a specific selection of locations that you want. After selecting the locations, press add selection and click the blue “Update” button.
- If it’s only one location where you want to make the changes, click “update” directly, as you don’t have to go through the process of selecting the locations.
- After updating/uploading the picture, verify if a gray check mark appears next to the changed parameter.
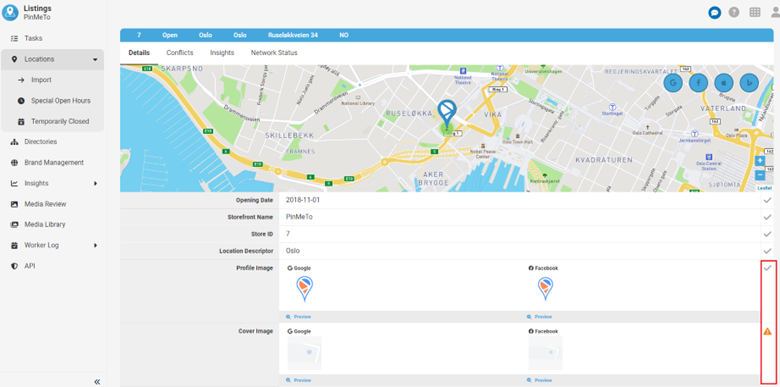
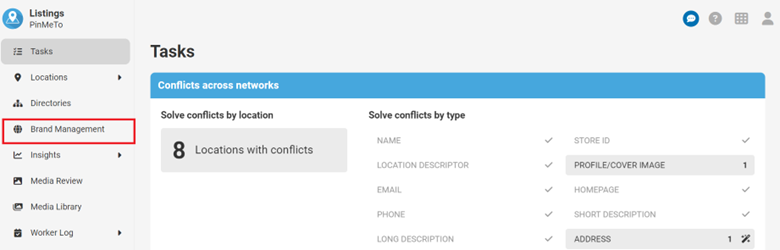
- If an orange triangle appears, it means that the image from one of the networks is different from what’s on the Listings in PinMeTo. Click on the triangle to verify the discrepancy between pictures and to solve the conflict by choosing what picture to use.

Brand Management
When adding a picture through Brand Management, it will apply to all locations and pages at the same time.
To add a Facebook picture through Brand Management, you need to:
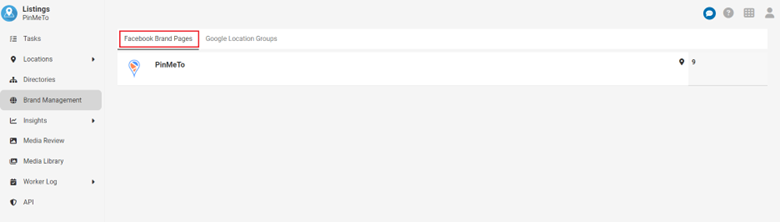
- At Listings, click the Brand Management button in the menu on the left.
- Select Facebook Brand Pages and the Page that you want to add the picture to.
- Click on “Profile Image” for the profile picture, or “Cover Image” for the cover picture.
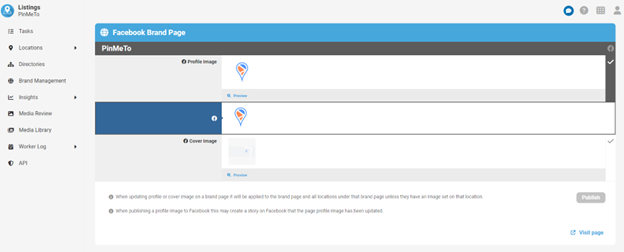
- Press “Upload Image” and select the new picture you want to add.
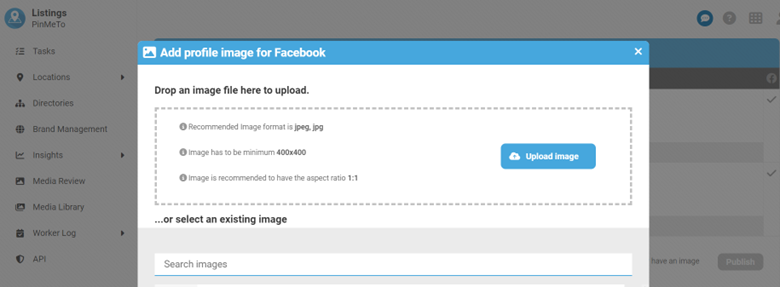
- You can also select one of the pictures you’ve previously uploaded to Listings.
- To finish and apply the changes, press the blue “Publish” button.
-When you update a profile or cover image on a brand page it will be applied to the brand page and all locations under that brand page unless they have an image set on that location.
To add a Google picture through Brand Management, you need to:
- At Listings, click the Brand Management button in the menu on the left.
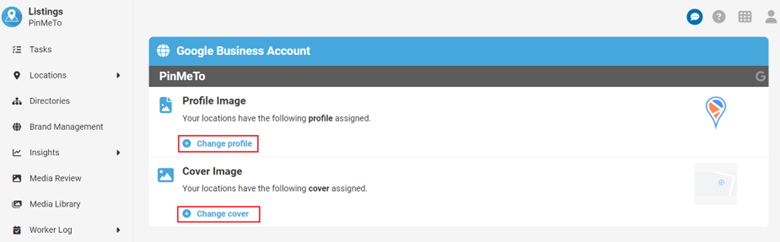
- Select Google Location Groups and the Google Business Account that you want to add the picture to.

- Click on “Change Profile” for the profile picture, or “Change Cover” for the cover picture.
- Press “Upload Image” and select the new picture you want to add.
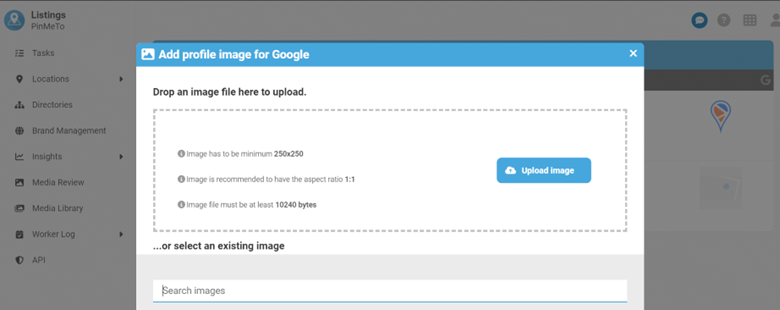
- You can also select one of the pictures you’ve previously uploaded to Listings.
- To finish and apply the changes, press the blue “Publish” button.