How to set up a Custom Group
Did you know that you can customize Groups for different location segments in Listings? Each Custom Group can be assigned to one User or a group of Users. This way, the User has access exclusively to that Group and will be able to manage and update the data only for those locations.
To set up a Custom Group, follow these steps:
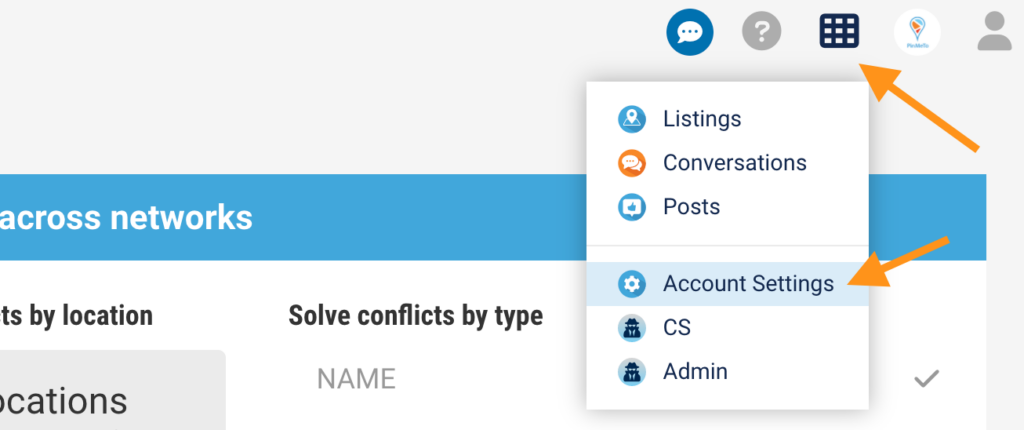
- Navigate to Account Settings by clicking the grid icon in the upper-right corner.
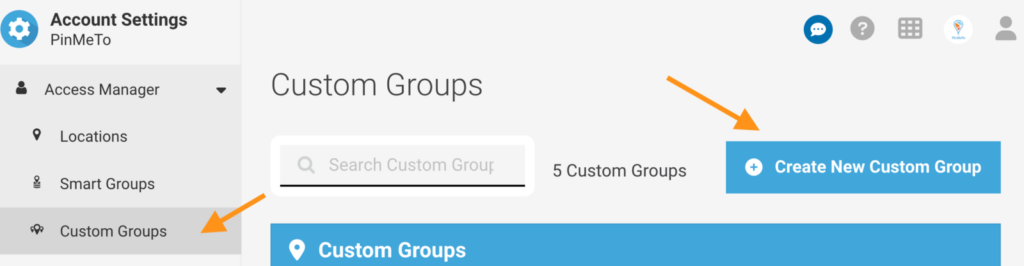
- Click on Custom Groups in the left menu and then Create New Custom Croup.
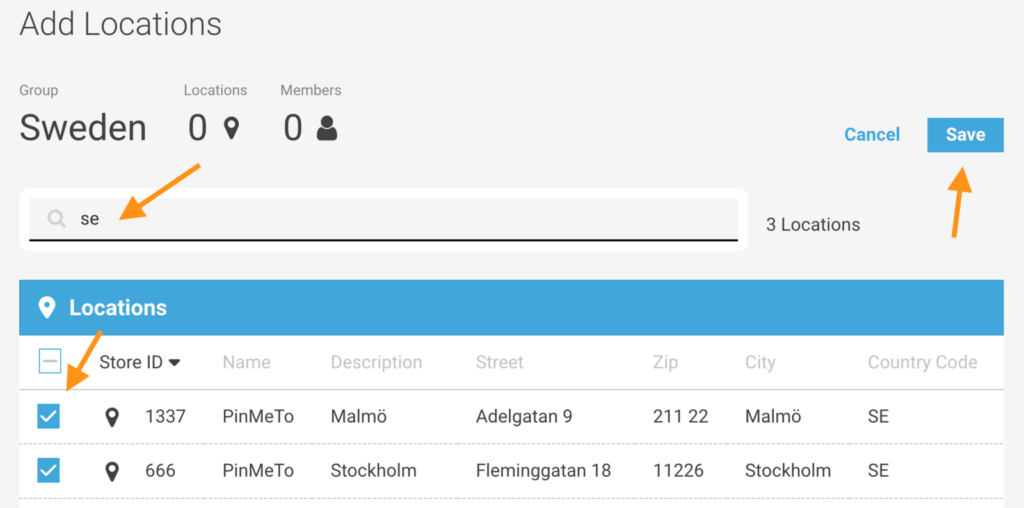
- Give a name to this Group and then click on Add Locations.
- Select the locations you want to add to the Group. Then click Save.
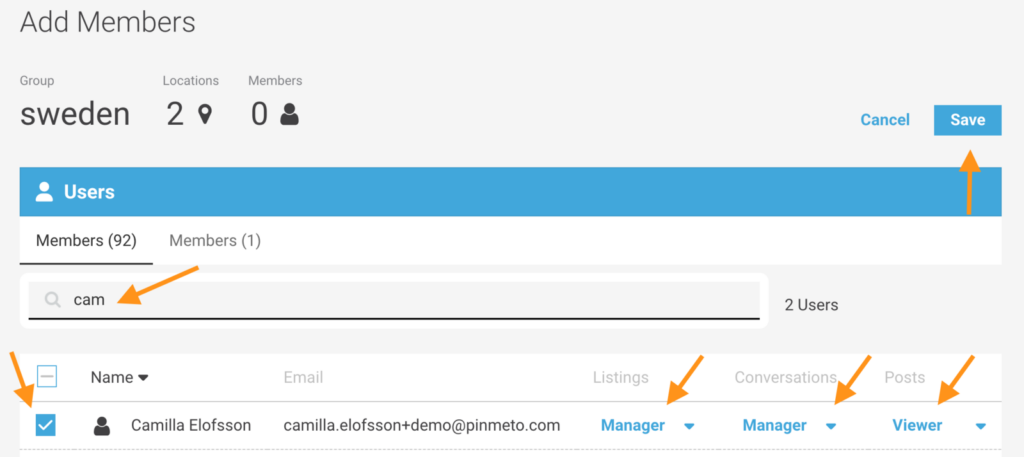
How to add Users to a Custom Group
- To add new Users to the Group, click on Members in the menu and then Add Members.
- Select the Members you want to add. You may determine what products should a User have access to. Then click Save. The Custom Group is now created. The Users have access to their products and locations.