How to Add a New User
PinMeTo is also made for teams and we know that teams are constantly growing and evolving.
So it’s incredibly easy to add a new user to your PinMeTo account.
To create a new user in PinMeTo Places, your role should be set as Owner of the account.
Follow these steps:
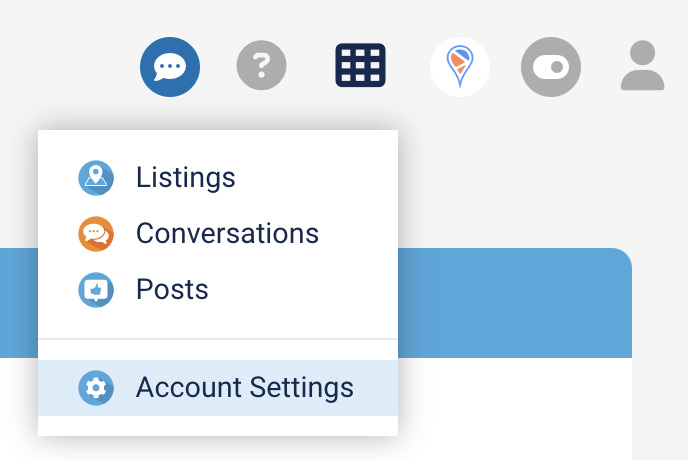
- Click on the grid icon in the upper right corner of your screen. Then select Account Settings.
- In the Access Manager, click on the Add New User button.
- Type the User information and set the Permissions for this role. Then choose the access level this account will get – a regular User or Owner of the account. Owners will have access to all products, locations and groups.
- You can also choose the ‘API Developer‘ Role.
This role is intended for users who will be implementing API integration with PinMeTo and require access to credentials, documentation, and logs. If the user only needs access to API settings, there is no need to grant permissions to any groups or locations.
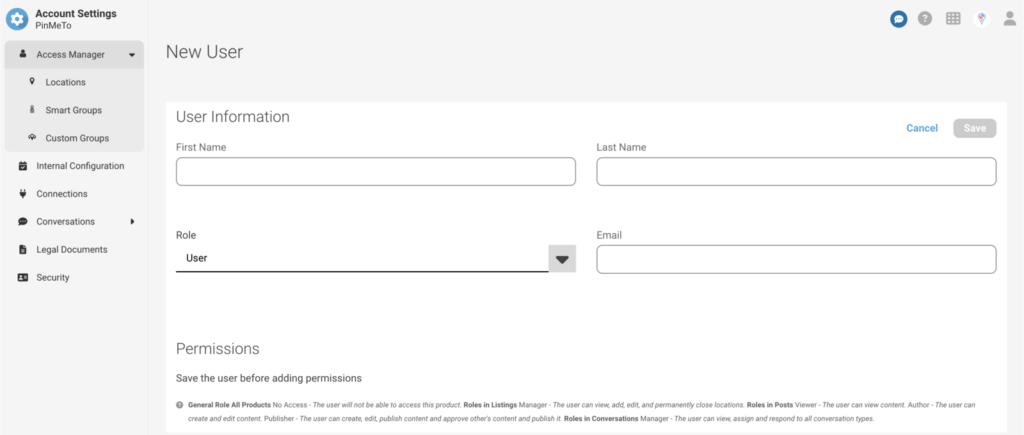
- When adding a regular User, you have to set additional permissions as well, such as the locations they should manage and the groups to be part of.
- The new User will get an email to verify their account, set up the password and the Two-Factor Authentication.

Two-Factor Authentication
The Two-Factor Authentication is a security feature that uses an SMS code sent to a mobile device in addition to a password for access. For security reasons, we recommend all customers to use this feature. The User will be prompted to add a mobile phone number on their first login.
Note
The User will need to very their account by clicking on the invitation link within 30 days, and create a password. The link will then expire. If this happens, a new code has to be sent in order to proceed with the verification. After creating the password, if the Two-Factor Authentication is activated the User will have to add the phone number and select if the Google Authenticator app should be used. You can either decide to use your Two-Factor Authentication with an SMS code sent to your mobile phone or through the Google Authenticator app.
Permissions
These are the Permissions you can set for the User role:
Listings
- No Access – The User will not be able to access this product.
- Manager – The User can add, edit, and permanently close locations. The User won’t be able to delete a location from the system.
Conversations
- No Access – The User will not be able to access this product.
- Manager – The User can view, assign, and respond to questions, reviews, etc.
Posts
- No Access – The User will not be able to access this product.
- Viewer – The User can see content, but won’t be able to edit.
- Author – The User can create and edit content, but won’t be ablet to publish.
- Publisher – The User can create, edit, and publish content, and approve and publish other users’ content.